Medium
Process:
Last year, after repeated requests from my wife to get a pool, we finally decided to risk spending $200 bucks with the fear that it would become yet another unused toy. However, to our surprise, Nate proceeded to spend 2-3 hours every day for the next 2 months in that pool. I have never seen him so active, excited and happily playing by himself; it was a sheer pleasure.
Once we packed it away for the winter, I found out that a co-worker of mine used to have a bigger, heavier-duty pool that he wasn't using anymore so we came to a deal where I worked for him for a full 40 hours and in exchange I'd "get rid" of his pool and 80 foot chain link fence.
Last year, we decided to just put the 12 foot Intex Walmart pool (30" deep) right on the grass which wasn't such a great idea. The ground was about 5" uneven and the grass got thoroughly killed underneath the pool.
So, considering the uneven ground, the killed grass and the bigger pool, we decided to prepare a proper base, sized for the bigger pool, even though we decided to set up the smaller pool for another year or two until our girls are a bit bigger.
The process was not too complicated from a technical perspective, but it sure was a lot of physical labor.
First, I had to strip the sod off the area we were gonna put the base, but because we wanted to do this on a limited budget, I decided to make my own Sod Cutter Attachment to the Pull-behind Lawn Roller that I had built a few years ago.
After the sod was cut (we put it on top of the killed grass from last year), I hired a guy that was doing a pool for our neighbor to come over and level out the area for me. The ground sloped an entire 8" but it only took about 5 minutes with the back hoe. It was WELL worth the $60 bucks I paid the guy. I cannot even imagine having to dig through our hard rocky clay by hand!
After the ground was prepared I ordered 5 cubic yards of tailings (also called "Zero to 1/4" or "crusher dust"), leveled it out and compacted it with my lawn roller.
After some humming and hawing, I decided to build a 2x6 border around the perimeter to contain the crusher dust and to make it a bit neater. That part actually wasn't too hard once I decided to put in the extra work.
First, I had to find the exact size of the pool and how far apart the supporting posts would be. The dimensions are 11'-5" wide by 18' long. The pool itself is 9' by 17'. I decided to make the base 1 foot wider on each side which worked out to be a 13'-5" by 20' pad. Next I marked the exact property line with a string between the surveyor's markers, then I marked a parallel line 32" from the property line as the starting point/edge of the pool.
From there, I used the Pythagorean theorem to get an exact 90 degree angle, measured the width of the pad and hammered in the 4 corner posts made out of pressure treated 2x2s. Using my dad's laser level, I marked the 4 corner posts and strung a string around the perimeter which I could then use to set more 2x2 posts at 4' intervals all the way around the pool.
Once these posts were in and level, all I had to do was to set the 2x6s and 2x4s around the outside perimeter, screw it all together and fill up the inside with more crusher dust.
After compacting the crusher dust (I should have taken some more time as it didn't compact as much as I would have liked it to) I cut up an old, leaking 18' above ground pool that I found for free on kijiji, laid it on the pad and cut it to size.
Finally we were able to set up the 12' pool and fill it up with water. Surprisingly, it only took about 6 hours and warmed up to 18 degrees within the first day. The second day, the pool went up to 22 degrees and on the third, it was almost 25 degrees.
The last thing I had to do is cut a 2' by 2' piece of 1/2" plywood into 4 identical triangles at a 45 degree angle to screw down the tarp in each corner so the wind wouldn't blow it up and we were done.
The kids love it and I've already taken some time to play in it myself.
Pictures:
 |
| The area after the sod was cut |
 |
| The stakes leveled to the correct height |
 |
| Another view |
 |
| Dumping the 5 cubic yards of tailings (I needed 1 more cubic yard later) |
 |
| The kids "helping" with the distribution |
 |
| My bigger two helpers |
 |
| Marking out the borders |
 |
| My little helper |
 |
| Installing the 2-by borders |
 |
| Another view |
 |
| The border done |
 |
| Testing out the base mat |
 |
| Playing with the tarp configuration |
 |
| Another 5 yards (4 for the driveway, 1 for the pool pad) |
 |
| Playing with the tarp layout |
 |
| Another view |
 |
| The pool pad done, the pool set up and the water being filled up |
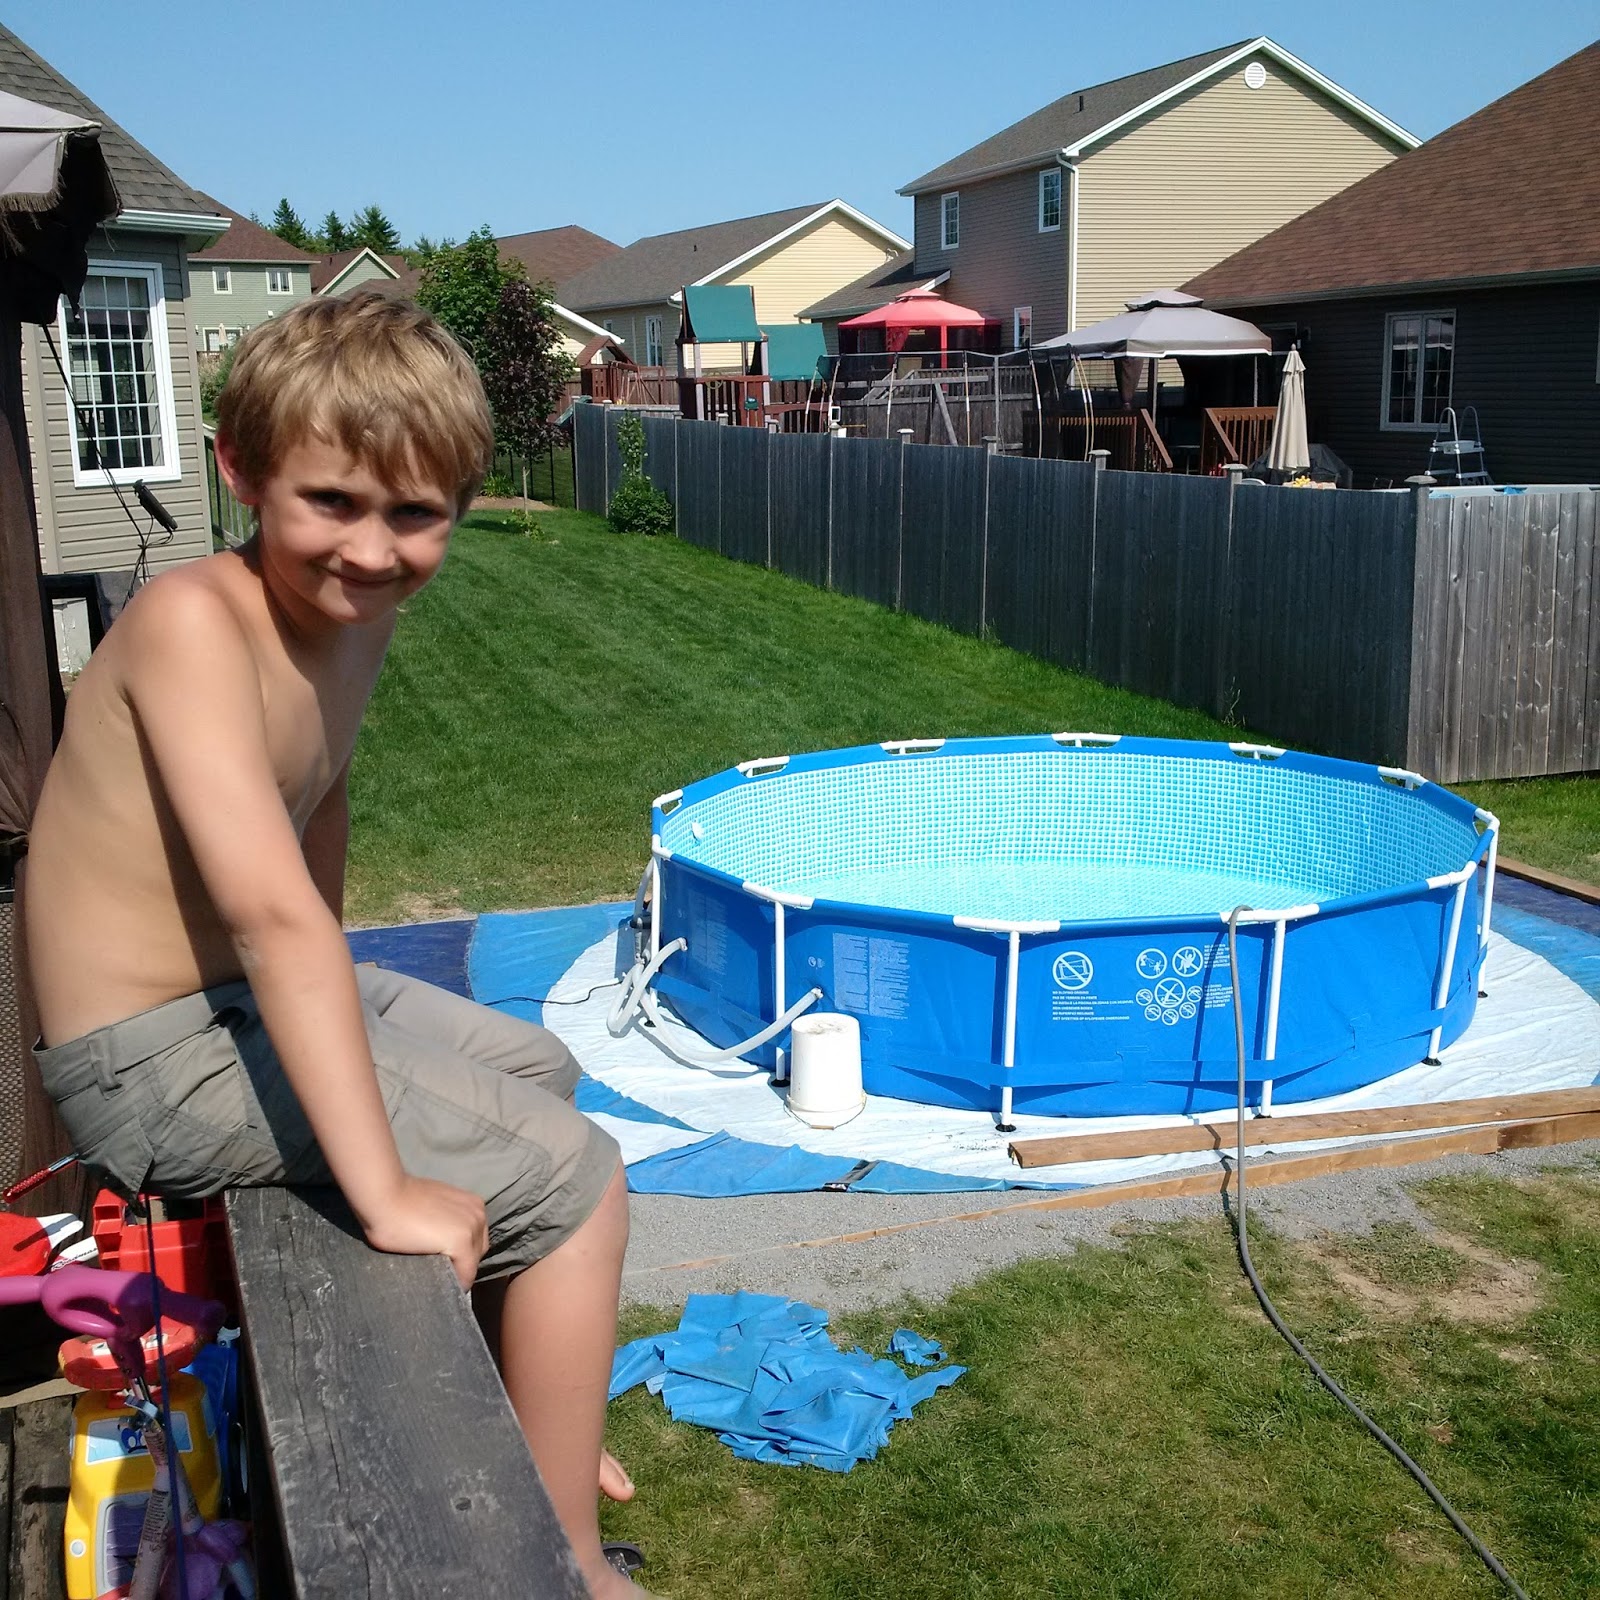 |
| My boy watching the water level rise |
 |
| Ready for a swim |
String
Measuring tape
Pencil
Sod Cutter
Rented back hoe
Wheel barrow
Shovel
Pick ax
Garden rake
Lawn tractor
Utility cart
Hammer
5lb hammer
Sledge hammer
Table saw
Chop saw
Laser level
Knife
Scissors
Cordless drill
Materials:
Construction spray6 cubic yards of tailings
Five 8' pressure treated 2x6s
Six 8' pressure treated 2x4s
3" deck screws
One old, leaking 18' above ground swimming pool
Gorilla tarp tape
One 2' by 2' piece of 1/2" plywood for tying down tarp in corners
Cost:
$450.00
Time:
30 hrs
Savings:
Over $1000
Conclusion:
It's great to have a pool now! I love it!

0 comments:
Post a Comment