Project:
Show my wife how much I love her by custom casting a beautiful heart
Process:
So even though we don't do valentine's (see Mel's blog at http://www.mel-eigenheer.blogspot.com/2012/02/anti-v-dayness.html for more details), I wanted to try my new foundry furnace and make something other than just plain old boring ingots (even though Nathaniel LOVES to play with aluminum ingots!).
I found an elegant scroll-saw pattern online of a heart I wanted to cast in aluminum and printed it out on paper. Since I threw out my carbon paper a year ago I had to find a way to trace the outline on my 1/8" piece of MDF.
I covered an area of the MDF with aluminum tape, and traced along the outline of the heart. The pen made an impression on the aluminum tape which I could then follow with the scroll saw. Once the heart was cut out, the arduous job of sanding started. With the help of a dremel and some sand paper I smoothed all the surfaces and gave it about a 5 degree angle to make the pattern easier to remove from the molding sand.
Next came powdering the pattern with talcum powder and filling up the drag with sifted green sand. After rapping it with a hammer, I flipped it over, covered the surface with some more talcum powder, then filled the cope with green sand, stuck in a pice of pipe for the sprue, took it all apart again and cleaned it up. Once all the sand was cleaned, the feeder was cut, the mold halves were combined again.
After about 25 minutes I had some good molten aluminum. This time I used a 50:50 ratio of NaCl and KCl as flux (making the aluminum more liquid) and some Sodium Bicarbonate (Baking soda) to de-gass the liquid aluminum. Finally, I was able to pour my first casting, after about 10 minutes I took it apart with anticipation and to my disappointment, the mold had barely started to fill, let alone fill the entire shape.
In retrospect I could have guessed that the 1/8" high channels the pattern left in the molding sand was too small for the aluminum to flow through before it solidified. Now I'm gonna have to make a thicker pattern. I'll try one at 1/4" and see if that works, next time I have a chance to go fire up the furnace.
Pictures:
Pattern printed out on paper
1/8" MDF with aluminum tape ready for tracing
Traced heart on the aluminum tape
Cut out heart before the aluminum tape was removed
Process:
After taking my 4 year old boy out to McDonalds for some breakfast, I decided I was gonna take him out in the shop and teach him some metal working skills and how to play with fire. Ok, I was just told by my wife that I wasn't supposed to have him out there when I blow up stuff, I mean build propane burners!
The propane burner I bought at Harbor Freight was a piece of crap and
suitable just about only to burn weeds so I needed something a little
more sophisticated. After some research I found out that a venturi
effect would be perfected with a 30 degree intake nozzle angle and a 5
degree exit nozzle angle, but since I don't have a metal lathe (yet!) I
ended up taking a 12" piece of 1" black water pipe that I got for free
at a local sprinkler business, screwed on a 1-1/2" to 1" reducer at one
end and a 2" to 1" reducer at the intake (those cost me $10 bucks cash
at the same sprinkler place).
For the propane intake, I found some 3/16" brake line pipe from
one of my previous car fixing adventure, a male bubble-flare adapter and
a female to female adapter to hook it up to the propane torch from
Harbor Freight (without the propane torch burner).
I had to make a bubble-flare on the brake line first, then turn
it into a double flare and connect the brake line to the
f-to-f fitting with the male adapter. Then I drilled a hole
through the 1" black pipe, drilled a 1/16" hole into the brake line and
stuck the brake line through the 1" water pipe at a right angle.
Once it was stuck through, I flattened the open end and soldered it shut with some regular solder. Works like a charm
Connecting the brake line to the propane torch needed a bit of
grinding and re-tapping the threads to make them fit the f-to-f adapter
but after some time that worked. The video below was taken before I welded the set screws to stabilize the brake line.
Once I connected the propane tank I realized that the brake line turned inside the water pipe and created a less than ideal burn ratio so I had to weld a nipple to the 1" pipe, weld 3 nuts to the nipple and use 3 screws to fasten the brake line solid. After welding a mounting bracket to the furnace and grinding off the hot end of the burner (it was just about 1/8" too large) I was able to stick it through the side of the furnace, fasten it in place with the set screw and light 'er up.
Then, at 8:30PM I decided to give the whole melting metal a whirl. Fired it up and within 10 minutes the crucible was red hot. I threw some pieces of a smashed up tranny case in there and within notime i had 10 lbs of molten aluminum. I made a quick sand mold out of some yoghurt cans, scooped off the dross at the top of the aluminum and poured it into the mod. Le voila! It works. Now I can build me a wood model of some ingots and start melting/refining the aluminum. Good times!
Pictures:
The burner in action
The first aluminum melt
Original burner used to dry out refractory cement wasn't powerful enough
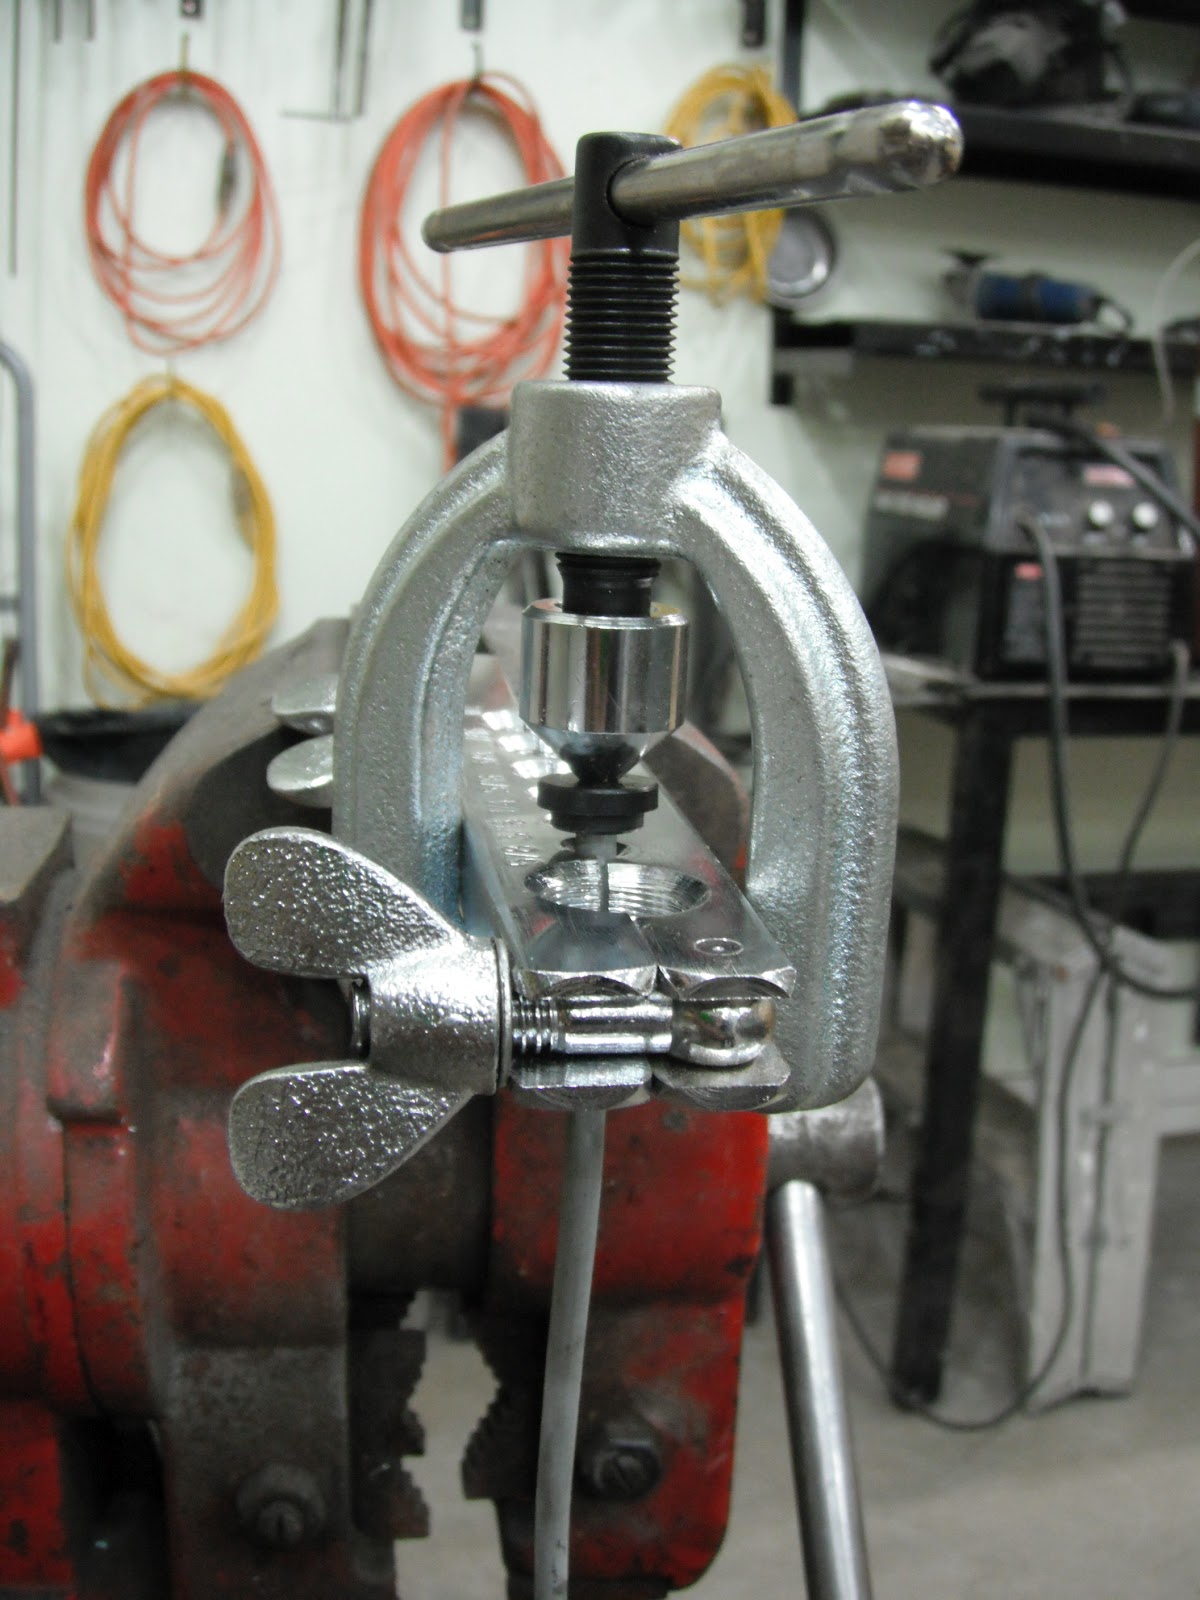
The double flaring tool used to first create a bubble flare on the 3/16" brake line
Then the same tool was used to create a double flare
Here's the finished brake line with the double flare, the male adapter and the f-to-f adapter
The double flaring tool. $20 bucks at Princess Auto
The burner in action. Note the shadows that the heat waves cast on the door...spectacular
View from the rear to the front while the burner was burning
The nipple with the 3 set screws to hold the position of the brake line in the perfect place
The real burner in the furnace
Close-up of the bracket I welded to the furnace to hold the burner in place and to make for easy removal of the burner
The red-hot glowing crucible with the molten aluminum
The yellow at the top is the front nozzle of the propane burner a "little" warm
The top of the sand mold once the aluminum solidified
The bottom of the sand mold where the molten aluminum contacted the second mold frame
It looks like there was a metal bold on one of the aluminum pieces I melted up. It just sank to the bottom and I could scoop it up once it all cooled down
From top, counter-clockwise: 10lb ingots, dross, left-over stuff from the bottom of the crucible
Materials:
12" of 1" diameter schedule 40 black water pipe, one 1-1/2" to 1" reducer, one 2" to 1" reducer, 6" of 3/16" brake line, one male double flare adapter, one female-to-female double flare adapter, propane torch, set screws, 4" of 1"x1/4" flat iron, some gas-rated teflon tape, 2" of 3/4" water pipe, some nuts for the set screws
Cost:
$10 for the reducers, $10 for the propane torch, the rest was left-over pieces of stuff I had in the shop.
Time:
About 7 hours including hunting for parts at Princess Auto and Tri-Province
Conclusion:
She's roaring alright! Gonna make me some molten aluminum now!
Update: After 5 years of using this foundry I decided to re-line the inside with some fire mortar. See the videos below Project:
It all started with inheriting a 1949 Ducati Cucciolo (motorcycle /moped) which in itself deserves its own blog post some day down the road. One of the things I've noticed was that the kick stand was broken. Of course, the first thought I had was gosh, I can fix that. But soon i realized that it was actually cast aluminum which is pretty much impossible to fix so I thought gee, I can MAKE one. That started the long (but rewarding) journey and research into building my own home foundry.
Process:
There are a few things that are needed for a home foundry:
Each of the above deserves a lot of details, but for the sake of brevity (and not to bore people, particularly my wife Melanie) I figured I'd give a brief summary, then the pictures
1. Foundry furnace
I found a 30 gallon steel drum at a scrap yard dealer for 10 bucks, cut it to size and lined it with a 2" layer of cement/vermiculite (1:8 ration by volume) with just enough water to make it workable. After curing the cement for a few days, I added a 3" layer of cement/silica sand/fire clay/water mixture (10:20:20:7 ratio by volume). After covering it with poly and letting it moist cure for a week I removed the poly and it's now drying. By the end of the week I hope it will be cured and dried enough to fire it
2. Propane burner
During our trip to the states I found a 20 buck propane burner that hooks up to a regular BBQ tank which I intend to use to fire the furnace and to use it to melt the aluminum. I will probably have to make some adjustments to it but I won't know until I'm ready to actually use it.
3. Molding sand
After some extensive research, I found out that molding sand is actually simply silica sand mixed with bentonite clay (the stuff well drillers use as lubricant and well sealant) and about 5% water. The clay makes the sand stick together enough to hold a shape and the coarseness of the sand makes it porous enough for the steam to escape when pouring molten aluminum into it. 4. Molding flasks
Simply a frame made out of wood to hold the molding sand
5. Crucible & tools
Although a $200 silicon carbide crucible would have been the cat's miao, I decided to go with the cheaper alternative and pick up a 6" long, 6" diameter 3/16" thick well casing at that same scrap yard for 5 bucks and weld my own crucible. The tools were made using 3/8" square solid iron rod bent into shape and a little hook from a piece of 1/4" round steel rod.
Videos:
Pictures:
1949 Ducati Cucciolo in its glory
Broken kick stand that was fixed by a previous generation
Drying out 40 lbs of bentonite clay
Ball mill used to crush up bentonite clay
Cement, silica sand and fire clay (clockwise from left)
Mixed up refractory (10:20:20:7 ratio by volume of cement, silica sand, fire clay and water)
Top 5" of water barrel with a 2" hole
Mixed up insulation (1:8 ratio by volume of cement and vermiculite)
Bottom 17" of water barrell
Welding 10mm rebar into the lid for reimforcement
After a 2" cement/vermiculite layer of insulation
Adding a 2" cement/vermiculite layer of insulation around the outside as well
Getting ready to place the refractory. I increased the hole to 4"
Lid drying out
Base after a 2" layer of cement/vermiculite insulation
Placing a 9" centre to leave a 3" space for the refractory
Cutting a 2" ABS pipe to create the hole for the propane burner
You can see the refractory is half way done
Almost at the top placing the refractory which was of a model clay consistency
Top-down view of base
Wrapped up in poly to cure for one week
After a week of moist curing, air drying it out for one week
A few 6" diameter well casings (9", 11", 6" high from L to R)
Cutting a base out of 1/4" flat steel
After the bottom was welded and a spout was hot formed
The crucible after welding the hooks on the side and the back
Hooked with the crucible tools
The crucible tools
As a test, I wanted to make a mold of a broken construction lamp
Filling in the green sand
The mold after it was rapped and struck off at the top
The mold was flipped around and the bottom of the construction lamp is now visible
After the construction lamp was pulled out. Normally, there is a second part of the mold, the two parts are put together and the cavity is where the molten aluminum is poured in
UPDATE: It's been 4 years since I built the home foundry and it is still going strong. The fire clay has developed some cracks but nothing too big; I won't even bother patching it up. The crucible is taking a beating but is still almost 1/4" thick so I don't see it failing anytime soon. Here are some updated pictures of the furnace and crucible:
Materials:
Vermiculite, silica sand, portland cement, fire clay, 30 gal. steel barrel, 4' of 10mm rebar, ABS pipe, sheet metal for core, 1/2" melamine for core, 6" dia. well casing, 1/4" thick and 8" wide flat steel for crucible bottom, 3/8" square steel rod and 1/4" round steel rod for crucible tools, poly Cost:
$200.00 so far
Time:
About 40 hours so far, not including time spent for research


