Wednesday, October 26, 2016

Temporary Fix for Leaking Hot Water Heater

Difficulty Level (Easy, Medium, Hard, Insane):
Easy

Process:
So I got up Monday morning, turned on the shower and waited for the water to get warm. And waited. And waited. After a few minutes I realized there was something wrong so I got out of the shower and made my way to our utility room where I heard this faint 'pshhhhhh' sound. At first I thought it was the natural gas but after some investigation I realized there was a little pin hole in the middle of the water tank, about 4" from the top right where the hot air ascends to heat the water.

Unfortunately, I had to go to work so I showered in ice cold water (which was NOT pleasant, but very quick) and started thinking about my options.

I called Enbridge Gas NB who told me that since I owned the hot water tank I could simply subscribe to their $20/month plan and they'd take care of it and we'd have hot water again before the end of the day.

They reluctantly admitted that there was a 10 year warranty on that tank (ours is only 8 years old), but that apparently the company that does the install can take up to a month to get it done AND I'd have to pay them $700 bucks for the installation, PLUS $100 for the gas permit PLUS $100 for freight.

Forget that!

So I called the distributor in town who said that they could provide the replacement hot water heater, but that I'd have to get a certified natural gas installer to do the install, BUT that if I did it that way, the warranty would cover everything.

Well, of course I'd rather spend some time phoning around and save $1000 than spending $2500 bucks over 10 years for the rental.

Unfortunately, after 3 days with no hot water plus some stove-heated-warm-water-watering-can-showers later, it was getting just a little bit too much hassle so I decided to lower the air agitator (not sure what exactly it's called) down the flue 4", cut a piece of 1/2" aluminum to the widh and radius of the 3.800" flue and jamb it cross-wise into the flue with some silicone baking pan material that I had bought for my Cappuccino Maker Leak. This fixed the pin hole leak and allowed me to turn the heater back on and hopefully will hold for a day or two until we get the new heater installed.

Man, it's amazing how much it affects your life to not have hot water in the house and to think that not too long in the past this is how normal families lived is hard to imagine.

Although I don't have the hot water back to normal, at least it's a temporary fix until tomorrow (hopefully)

Update:
So after 4 long days of making phone calls back and forth between:

1. Enbridge Gas NB
2. Bob's Heating (installer)
3. Kerr Controls (distributer)
4. Giant (manufacturer)
5. Cornerstone (extended warranty provider)

they were able to confirm that my 10 year warranty apparently is "pro-rated" which means that after 8 years, I'll get exactly $209 paid towards the purchase of a new hot water heater and does NOT include any installation or parts. Well, that really sucks, so after calculating that the purchase of a new water heater would run me about $2000 and the rental (through Enbridge) would cost me $2500 over 10 years (free maintenance and repairs throughout the rental period) we decided that we'd just rent one, and wouldn't you know it, 12 hours later we had a brand new heater installed and ready....Ughh...

Since we had purchased the original hot water heater, I decided that I was going to keep it and have Nathaniel help me take it apart. We spent about an hour and a half in the shop taking it apart and scavenging it for parts, the rest of it went to the scrap yard and I even got $3.50 for the metal. Yeah...

Having a further look at the area that was leaking it was definite corrosion. The sacrificial anode (which they conveniently made inaccessible) was completely eaten away. If they had made it accessible, I would have checked and replaced it 3 years ago (I even called Enbridge to ask them where the anode was located and they said that they didn't have any...yeah right!)...

Anyways, the hot water is back on and our bill has increased by $20/month. Not a lot, but definitely something I was hoping to avoid considering I had this wonderful "extended warranty"...

Videos:


Pictures:
R10 insulation around the water tank
A small amount of water that leaked out of the catch pan
The vent and fan removed
Hot water tank info
The cut open hot water heater tank
The stalakites (or stalagmites?) at the top of the heater from all the calcium in the water
Close-up of the disgusting hot water heater insides
The leaking area cleaned off
Close-up of the corroded pipe with the hole that was leaking
Scavenged gas control module & heating probe
Tools:
Drill
Screw driver
Pliers
Metal lathe and accessories
Metal band saw
Flashlight
Dry/wet vacuum

Materials:
10" of metal wire
4" of 1/2" aluminum rod
1 piece of silicone baking pan material

Cost:
$0.00

Time:
1hr

Savings:
$1000

Conclusion:
Taking warm showers is so nice!!!

Saturday, October 22, 2016

DIY 20-Ton Shop Press With Upside Down (Inverted) Bottle Jack

Difficulty Level (Easy, Medium, Hard, Insane):
Medium

Process:
A few years ago I had to change my van's wheel bearing and ended up having to use a friend of mine's shop press to remove the axle from the wheel bearing (it was completely rusted in) so that's the first time I've wanted to get a shop press, but since the Princess Auto Shop Presses are close to $500 bucks here in Canada and even the Harbor Freight Shop Press is almost $300 bucks (with the current exchange rate) I've never taken the plunge to buy one.

So it was about a month or so ago when I got into a bit of a rut and decided that there's nothing better than a "little" project to snap out of it. Hence, the 20-ton shop press project.

I had bought a whole bunch of metal at an auction in March including two 8" c-channels that were 30" wide so I decided to buy the rest of the material and get building the shop press. The most time consuming part was drilling the 1.250" holes into the 3/8" vertical pieces of metal but after about an hour and a half (maybe 2 hours, I wasn't really timing it) it was all done.

The next thing I had to do was cut the horizontal bracing pieces and weld the two uprights. Then I had to drill the movable c-channels with 3/4" holes and make 4 spacer pins out of 1" hot rolled steel (that was fun).

Then I had to weld all the rest together and paint it. The last thing I had to do was take the bottle jack apart, connect a piece of vinyl hose to the pump inlet and then drill a hole into the side and connect it with an old gas tank that I used as an overflow reservoir for the hydraulic oil.

Lastly, I had to bend two 10" pieces of 3/8" square stock, drill and tap it for some 1/4" by 20 TPI bolts and hook it up to some trampoline springs for the piston return.

All-in-all, this project probably took me about 20 hours (I wasn't really counting) and cost me about $200 bucks. In all honesty, if I was really concerned about the time it would probably not be worth building it but would have just picked one up at Harbor Freight next time I was down in the states, but I wanted to work on a project and I still saved a few hundred bucks.

Videos:


Pictures:
The 8" c-channel pieces I bought at an auction
Grinding off the rust and yellow paint
The paint dust on the floor
The c-channel sans paint
Another view
The two c-channel pieces ready for welding
Lining up the vertical support pieces
Pre-drilling the 4 vertical pieces
Close-up of the 1/8" pre-drilling
Cutting the welded pieces to equal length
Welding the upright pieces
Another view
Making sure they're all perfectly square
Cutting the cross-brace pieces to length
The cut cross-brace pieces
One upright piece done, the other one being worked on in the background
Getting ready to weld the vertical pieces to the cross beam
The main beam welded to the support
Close-up of the welds
The cross braces above where the bottle jack will go

Welding casters to the legs 
Welding the legs to the frame
The welding all done
Another view
Cutting the lower cross beam to length
Drilling holes into the lower cross beam
Another view
Cutting the 1" bar for the cross braces
Cutting the relief grove on the cross brace
Close-up
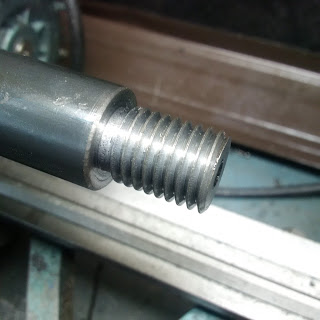
Cutting the 3/4" by 10 TPI thread
Another view
Close-up of the thread
Another view
Test fitting the nut
The finished cross brace
Another view
The cross brace with the nuts screwed on
The lower cross beam ready for painting
Another view
The lower cross beam with one cross brace installed
Another view
Getting ready to paint the finished shop press
My temporary paint booth 
The shop press painted
Close-up
Another view
Another view
Another view
Drilling the mounting holes
Using a metal bar to unscrew the bottle jack lid
Using a metal bar to unscrew the bottle jack
The bottle jack after the fluid was drained and the outer shell taken off
Close-up of the suction hose
All the parts that came off the bottle jack
Cutting off part of the intake
The vinyl hose attached to the intake
The vinyl hose cut to size
The drilled hole and attached vinyl hose for the hydraulic oil overflow
Another view
Another view
Bleeding the bottle jack of all the air
Another view
Using prussian blue to flatten the bottom of the bottle jack
The high spots are marked blue
The closer to flat it gets, the more spread out are the blue spots
Cutting and drilling some aluminum trim to hold up the hydraulic oil overflow tank
The installed overflow tank
Another view
Close-up of the oil level indicater
Getting ready to install the jack ram return spring
Close up of the return springs and the hydraulic oil overflow connection
Tapping the 3/8" square bar of the piston return bracket
AutoCAD print-out of the piston return bracket
The piston return bracket and springs
Close-up of the right side of the piston return bracket
Another view
Close-up of the left side of the piston return bracket
Under-side view of the piston return bracket
The finished shop press
Tools:
Metal lathe & accessories
Metal Band Saw
Drill press
Drill
Drill bits
Measuring tape
Pencil
Marker
Mig welder
Stick welder (for the thicker stuff)
Tap & Die set
Adjustable wrench
Vise
Angle grinder
Ear muffs & safety goggles
Body paint spray gun
Socket set


Materials:
28' of 3" by 3/8" flat bar
4' of 1" solid round hot rolled steel
2' of 1.250" solid round hot rolled steel
4 casters
6' of 2" by 2" by 1/8" angle iron
5' of 1" by 1" by 1/8" angle iron
5' of 8" c-channel
6' of 6" c-channel
1 old lawn mower gas tank
2 L of hydraulic oil
2' of aluminum trim
4 screws for the tank
4" of 3/8" vinyl hose
1 brass adaper
6 trampoline springs
2' of 3/8" solid square steel
2 cap screws
1" of 5/8" brass for the spacer bushings
8 nuts (3/4" by 10 TPI)
Painters plastic
Black rust paint (1/2 L)

Cost:
$200.00

Time:
20 hours

Savings:
$100 to $300

Conclusion:
It works great. Now it's probably gonna sit in my storage room for the next year or two before I use it again. But just like a {fill in the blank}, better to have it and not need it than to need it and not have it.

Followers