Easy
Process:
When I first built my Pull-Behind Lawn Roller I didn't have a lathe yet so I just hacked something together for closing up the hole in my lawn roller. However, it was always leaking and I've wanted to do something more permanently so I took a chunk of metal, turned, faced, bored and threaded a 12 pitch thread on the inside of the ring. After that, I took a chunk of 2.500" aluminum I had cast with my Home Foundry a while back, cut off a piece on my Metal Band Saw, turned and knurled the outside, then turned the other half to size and threaded it to a matching 12 pitch thread.
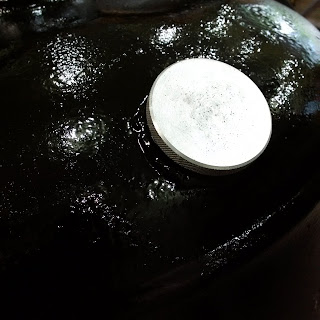
The only thing that was left to do is weld the outside ring to my lawn roller, slip an o-ring on the cap and screw it on. This was more of a "would be nice to have" project and not so much a "really need this" project so I did enjoy making it
Videos:
Pictures:
 |
| The 2.75" ring with a 12 TPI female thread |
 |
| The cap made out of aluminum with a matching 12 TPI male thread |
 |
| Another view of the aluminum cap |
 |
| The cap with the o-ring installed |
 |
| The o-ring kit I bought at princess auto or harbor freight, I can't remember which one it was |
 |
| Grinding off some of the tar in preparation for welding |
 |
| After the ring was welded to the lawn roller |
 |
| Another view |
 |
| Test fitting the cap before applying some more asphalt spray |
 |
| After the asphalt was sprayed on |
 |
| The installed cap |
 |
| Another view |
Metal lathe & accessories
Metal band saw
MIG welder
Angle grinder
Ear muffs & safety goggles
Materials:
1/2" of 2.500" diameter metal
1" of 2.500" diameter aluminum
One 1.750" diameter o-ring
Some asphalt car undercoating spray
Cost:
$0.00
Time:
2 hrs
Conclusion:
It works great and finally seals properly

0 comments:
Post a Comment