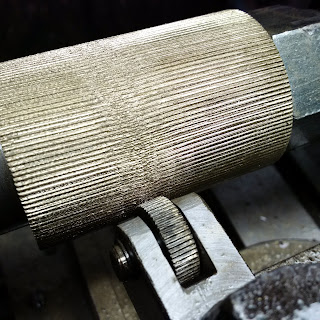
Making a straight knurling tool
Difficulty Level (Easy, Medium, Hard, Insane):
Easy
Process:
I was in need of a straight knurling tool for my Okuma Lathe Phenol Replacement Gear project and didn't have time to order one online. I also refused to pay $40 bucks or more for something so simple so I decided to make my own.
The process was fairly straight forward: take some O1 tool steel, cut 60 grooves in the outside, drill, part and harden it. Then cut a 8mm slot into a square piece of mild steel, drill a hole through it and pop in the hardened knurling wheel.
Videos:
Pictures:
 |
| The piece of O1 tool steel ready for cutting groves into the outside |
 |
| The piece of O1 tool steel mounted in my dividing head |
 |
Side view of the cutter used to cut the grooves in the ouside |
 |
| About half-way there |
 |
| Getting ready to part off the wheels |
 |
| The finished knurling wheels |
 |
| Getting ready to drill the knurling tool holder |
 |
| Cutting off a 1" piece on the metal band saw |
 |
| Using a slitting saw to cut the slot into the knurling tool holder |
 |
| Milling the ends of the knurling tool holder nice and flat |
 |
| Another view |
 |
| Close-up of the slotting action |
 |
| Another view |
 |
| I ended up switching to a larger diameter HSS slitting saw |
 |
| Getting ready to knurl the 2" brass |
 |
| Looking pretty good so far considering a home-made knurling tool |
 |
| There were some spots where I had stopped in the middle that didn't look so pretty |
 |
| Another view |
Metal lathe & accessories
Metal band saw
Dividing head
Materials:
2" of 3/4" O1 tool steel
4" of 3/4" square mild steel
Cost:
$0.00
Time:
3 hrs
Savings:
$40.00
Conclusion:
The home-made knurling wheel did not leave a very nice finish so I ended up ordering a knurling wheel online for future jobs that require a nicer finish, but $5.00 for the wheels is still better than $40 bucks for the whole tool.

1 comments:
If the knurlizing is for a press fit, then looks aren't paramount to the product. On the other hand, if it's for eye appeal, then there's that to consider too.
I'd say it's purposeful and successful. Good on you for the job you needed at the moment.
Post a Comment