Building a Swing Bed for my wife's Backyard Sun Shade Pergola
Difficulty Level (Easy, Medium, Hard, Insane):
Medium
Process:
This one was actually a bit tricky for two reasons:
1. I wanted the swinging mechanism to be nice, smooth and quiet
2. I wanted to be able to turn the swing bed into a regular width swing
I decided to accomplish #1 by not using chains but to use bearings instead. Except for it took a little "Eigenheering" (as a friend of mine calls it) to get the support brackets just right. I could have just bought the ready-made bearing supports from Princess Auto but I didn't want to spend $120 on that alone so instead I bought 8 bearings for a couple bucks each and another $10 bucks worth of iron. And, now I can support at least 1200 pounds on those supports...
The bed frame was definitely a bit tricky because I'm chopping out a square piece in the middle essentially leaving two corners unsupported. So I had to do some doubling up of the 2x4's to make it strong enough.
The last thing I had to do is fit some cross-braces in the roof beams and cut 4 holes through the shade cloth (after I sewed a circle around the hole to prevent from tearing)
Now it's being used a lot and it definitely scored me some brownie points with my wife!
Videos:
Pictures:
 |
| The "Eigenheering" diagram |
 |
| After all the pieces were cut up |
 |
| Starting the substrate/framing |
 |
| The frame taking shape |
 |
| Adding the arm rest support structure |
 |
| Placing the back rest boards |
 |
| Starting on the sitting area |
 |
| The removable insert with the angle iron slides |
 |
| Close-up of the center insert sliding mechanism |
 |
| Almost done |
 |
| With the center insert removed |
 |
| Bending and welding the iron support brackets |
 |
| The four support brackets when the welding was finished |
 |
| Test install before painting |
 |
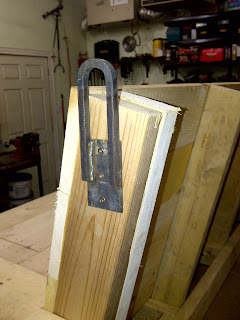
| The support bracket at the back |
 |
| Done and ready to hang |
 |
| Placing it in its final position so I could mark out the support beams |
 |
| Starting on the vertical rods |
 |
| Welding some washers to the square tubing to make it stronger |
 |
| All done |
 |
| Close-up of the supporting square tubing |
 |
| One of the top support brackets |
 |
| All the iron work is done |
 |
| Hanging the parts for painting |
 |
| The rods after they were painted |
 |
| All the iron parts painted, dried and ready to install |
 |
| The top bracket installed (with the neighbor's pool in the background) |
 |
| Bottom front support with bearing installed |
 |
| Bottom rear support with bearing installed |
 |
| Ellie testing it out |
 |
| Testing with the center insert removed |
 |
| The girls enjoying "their" new swing |
Chop saw
Table saw
Drill press
Mig welder
Level
Measuring tape
Pencil
Drill
Nail gun
Jig saw
Angle grinder
Oxy/Acetylene torch
HVLP spray gun
Hand saw
Hammer
Plumb-bob
Wrench
Materials:
10-2x4-8ft
10-1x6-6ft
1-2x6-12ft
8 2" bearings
6ft of 3/16"x 2" flat iron
2ft of 3/8" x 2/8" square iron
24ft of 3/4" x 3/4" square tubing
4ft of 3/4" x 3/4" angle iron
16 metal washers
8 3/8" x 1-1/4" bolts with nylon locking nuts
8 joist hangers
Nails
Screws
Cost:
$135.00
Time:
10hrs
Savings:
$200.00 or more
Conclusion:
Love it. And my wife does too!

1 comments:
I just had a wonderful nap on the swing! thank you!!!!
Post a Comment