Saturday, December 12, 2015

Fixing Quill Spring For 10" King Drill Press

Project:
Making a replacement quill spring case

Difficulty Level (Easy, Medium, Hard, Insane):
Easy

Process:
When I bought a 10" king drill press at one of Woody's Auctions I learned a lesson: never bid on anything that you haven't had a decent time to inspect. Since I had brought my 1yr old daughter with me that day I was a bit distracted and unfortunately hadn't noticed that "someone" had tied an elastic tie strap around the top and fooled me into believing everything was ok with the drill press.

Once I got it home and took off the elastic, the quill dropped right down which is when I realized that the quill return spring was missing.

Anyways, after some searching online I found various ways to fix broken or missing quill springs but since I have a lathe now I figured I'd buy a $3 replacement spring on ebay and make myself a little housing on the lathe.

It was actually quite simple. I measured the spring once I got it in the mail, made the housing a bit bigger and a bit deeper, popped the spring into it but then I realized that the spring was too big for my drill press and because of that I had made the case too big for the drill press. Bummer. I ended up making the housing a bit smaller to fit on the drill press, made it a bit deeper and cut the spring in half. Once I installed the spring into the housing I bent the end to how it should be, painted the housing and installed it on the drill press. Take that woody!!!

Pictures:
The missing quill spring and housing
Cutting off a piece of 2" cold rolled steel which ended up being too small
Facing the CRS
The spring from ebay
The housing off of a smaller drill press
Cutting off a 2.25" piece of gray cast iron (nasty, dirty stuff) for the second attempt
Boring out the inside of the housing
The finished housing (2nd attempt)
The housing with the new spring (2nd attempt)
3rd attempt (smaller housing, 1" deep, 1.860" inside diameter, 2.25" outside diameter
The finished housing with the spring installed
The inside of the spring housing with the cut and bent spring
Putting a quick coat of paint on it
The installed housing
Another view
Tools:
Angle grinder
Pliers
Metal lathe
Tin snips
Drill bits

Materials:
1" of 2.25" gray cast iron
Black spray paint

Cost:
$3.00

Time:
1hr but only because I had to do it 3 times

Savings:
I don't know, maybe $30 bucks

Conclusion:
Works great and looks alright too

Wednesday, December 9, 2015

Fixing Mig Welder Argon Regulator Adaptor

Project:
Making a little adaptor for my mig welder's argon regulator

Difficulty Level (Easy, Medium, Hard, Insane):
Easy

Process:
When I bought my mig welder way back to do my Rocker Panel Repair it came with a standard Argon flow regulator (Model #: CTM-2557 by Western Enterprises). It had a little push connector for the gas hose which ended up getting destroyed so it was no use to me so I had to go buy a regulator for about $70 bucks.

Tonight I saw an ad on kijiji of someone looking for a regulator and I remembered that I had kept the original one. Since I've now got a lathe and some small brass stock I decided I was going to email him and tell him he could have mine for $20 bucks.

Out in the shop I went, found the regulator, took a 3/8" piece of brass rod, turned it down to the proper size, cut a thread on one end and reduced the other side to a little over 3/16" with a bit of a retaining barb. Voila, $20 in just a few minutes that I would have otherwise had to just throw out or sell for $2 at the scrap yard.

Pictures:

The original regulator
The damaged push connector
The part almost finished in the 3-jaw chuck
Once it was cut off and de-burred
The new part installed on the flow regulator
The flow regulator with the hose installed on it
Tools:
Lathe
Tap & Die set
Hacksaw
Drill bit

Materials:
1" of 3/8" brass rod

Cost:
$0.00

Time:
20 minutes

Earnings:
$20.00

Conclusion:
Glad I kept the regulator for all these years

Tuesday, November 3, 2015

Fixing Our Delonghi DCH1030 SafeHeat Space Heater

Project:
Fixing a screeching fan of our little space heater

Difficulty Level (Easy, Medium, Hard, Insane):
Easy

Process:
We use a little space heater on the fan setting for some background noise while our little girl has her nap and Melanie told me that it stopped working. After some investigation it ended up being just a squeaky motor bearing that started vibrating to the point where the friction was too much so it stopped turning.

All I had to do is take it apart with a screwdriver, put in some oil and put it all back together. One thing that helped me out was a trick I learned way back when when I was going through my Lexmark printer repair certification at work: They said to take a hypodermic needle, fill it with oil and then use the pointy needle to get at hart to reach areas. In this case it worked like a charm and so does our little space heater again now.

Videos:


Pictures:
The fan taken apart
The front side of the fan motor after the fan was removed
After the bearing was oiled and the fan reinstalled
The back part of the fan
Putting a few drops of oil into the bearing
Another veiw
The heater almost back together
Our space heater all back together
Tools:
Screwdriver

Materials:
Drop of oil

Cost:
$0.00

Time:
1 hr

Savings:
$40.00

Conclusion:
Works like a charm!

Fixing our GE WR60X10185 Refrigerator/Freezer DC Evaporator Fan Motor

Project:
Fixing the evaporator fan for our side-by-side freezer

Difficulty Level (Easy, Medium, Hard, Insane):
Easy

Process:
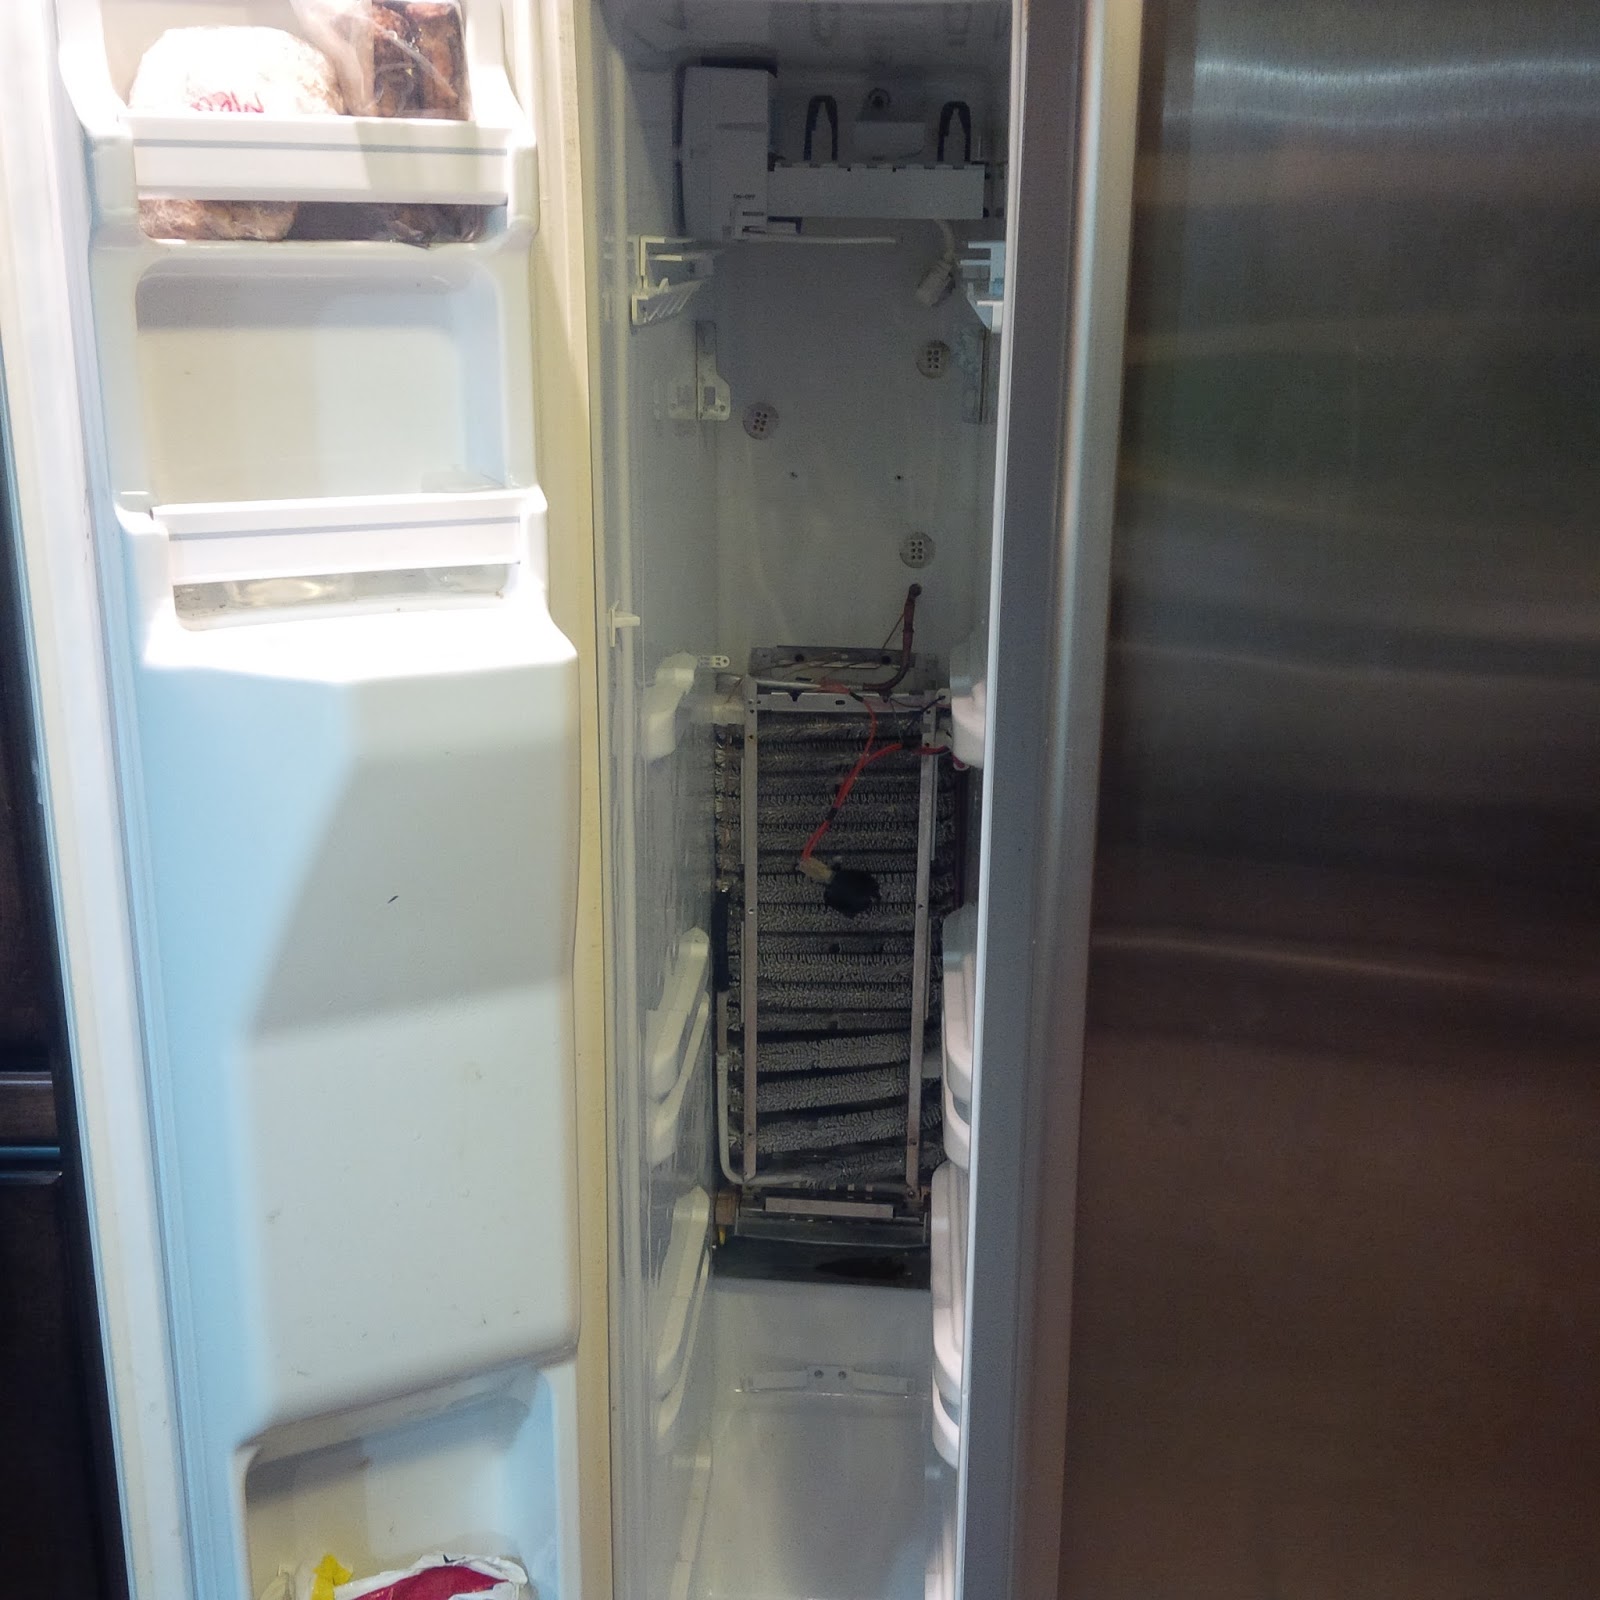
When my wife was starting to put away our groceries last night she noticed that the freezer seemed to be a lot warmer than usual and some of the thin items had started to thaw. Most items were still very well frozen, but there was definitely something wrong.

We unloaded our freezer and put (almost) all the stuff in our deep freeze but some frozen apple sauce didn't fit so in the tub they went because I wasn't sure how long we'd have to be without the freezer.

Here's the order of dismantling:

1. Food
2. Shelves
3. Ice maker unit
4. Plastic cover
5. Metal cover
6. Fan housing

After I had taken off the metal cover, before I knew what was actually wrong I looked at the cooling coils and they were all pretty iced up. After melting off all the ice with a propane torch (I went very easy on the heat so as to not damage anything or light the freezer on fire) they started icing up again right away so I knew that the actual cooling still worked. After some more trouble shooting I found that the issue was with the fan that circulates the cold air so I had to take off the fan housing as well.

Once the fan housing was off I clearly saw what was wrong: one of the little cables that went to the fan had broken right off with the years of use. Unfortunately, there was no plug on the motor and the motor housing itself was an injection molded piece that could not be taken apart.

Since I had apple sauce thawing and I didn't want it to spoil and I didn't want to bother a neighbor to see if I could "borrow" their freezer I decided I was gonna try to fix the broken off wire.

I hauled out my cut-off saw and cut around the broken wire, then finished with a smaller dremel bit to clear a little more than 1/4" of the buried wire. Once I cleared enough solid metal I soldered the wire back on, used some shrink tubing around the wire, masked the area with some tape and filled it in with 2-component (dollar store) epoxy glue.

After putting the fan back in the housing and the housing back in the freezer, I followed the steps above in reverse and put our frozen food back in.

After calling a local repair shop they advised me that it would take 6-8 weeks to get the part and the part alone would cost over $70! Glad I was able to fix it for FREE!!!

Videos:


Pictures:
All the freezer parts on the countertop
The inside of the freezer behind all the panels
The fan unit
The broken off wire
Grinding off the plastic around the broken off wire
Grinding fine details with dremel
Enough of the wire exposed to start soldering
Close-up of the two wires that need to be soldered
Shrink tube kit from princess auto
After the wires were soldered
After the shrink tubing was fixed
The fan, fan motor and motor housing
Masking off the area with some scotch tape
After the cavity was filled with 2-component epoxy glue and the scotch tape was removed
The fan installed back in the housing
Another shot of the installed fan
After all the panels were installed again
After the ice maker unit was installed again
Ready for the food

Tools:
Drill
Socket set
Dremel
Air cut-off saw
Soldering iron
Knife

Materials:
1" 3.5mm diameter shrink tube
Two-component epoxy glue

Cost:
$0.00

Time:
2.5 hrs

Savings:
Probably at least $200 for the tech and the part

Conclusion:
Works great!

Sunday, November 1, 2015

Turning Down Some Bushings on my Metal Lathe

Project:
Turning down 4 metal bushings by 60 thou for the guy who bought my Gingery Lathe

Difficulty Level (Easy, Medium, Hard, Insane):
Easy

Process:
I finally decided to sell my Gingery Lathe and the guy that ended up buying it had some metal bushings to turn down for his tractor so he asked me if I could do it for him on my Emco Maximat V10 metal lathe.

The dimensions were:

Length: 2.25"
Inside diameter: 1.00"
Outside diameter: 1.50"

He wanted the outside turned down about 60thou so I figured that shouldn't be a problem.

At first I attempted to put an arbor in my chuck and turn down a 60 degree cap on the other end so I could put some pressure on it with my live center, but the friction between the arbor and the bushing wasn't enough and it started slipping.

Luckily, the bushings had a hole drilled in them so I drilled and tapped a hole into my arbor, inserted a set screw to protrude just enough to catch the hole in the bushing and then turning them down 60 thou was a breeze.

Videos:


Pictures:
Turning the end cap with a 60 degree bevel and center drilled for the live center
Close-up of the bushing installed
Starting to turn down the bushing but it ended up slipping
After the set screw was drilled, tapped and installed to lock the bushing
Another view of the bushing installed and locked onto the arbor
The bushing on the arbor with the end cap to center the work
A view of the turned down bushing
Tools:
Metal lathe & accessories
Drill
Tap & die set

Materials:
6" of 1.25 cold rolled steel
1/4-16 set screw

Cost:
$0.00

Time:
1/2 hr

Conclusion:
It was fun.

Followers