Saturday, November 3, 2012

3-Unit Wardrobe

Project:
For over 3 years I've been wanting to get rid of my old dressers and build me a new wardrobe so I won't have to shove all my clothes into small drawers but instead fold them up neatly and put them on shelves. I guess it's a European thing, but I just find that I can see my clothes better and keep them nicer organized on shelves than in drawers.

Finally, now that Eliana was a bit over 3 months old I decided to tackle this project. I knew it was going to be a long one and between the feeds, naps and other family obligations I knew I'd only get a couple of hours per day in if I'm lucky.

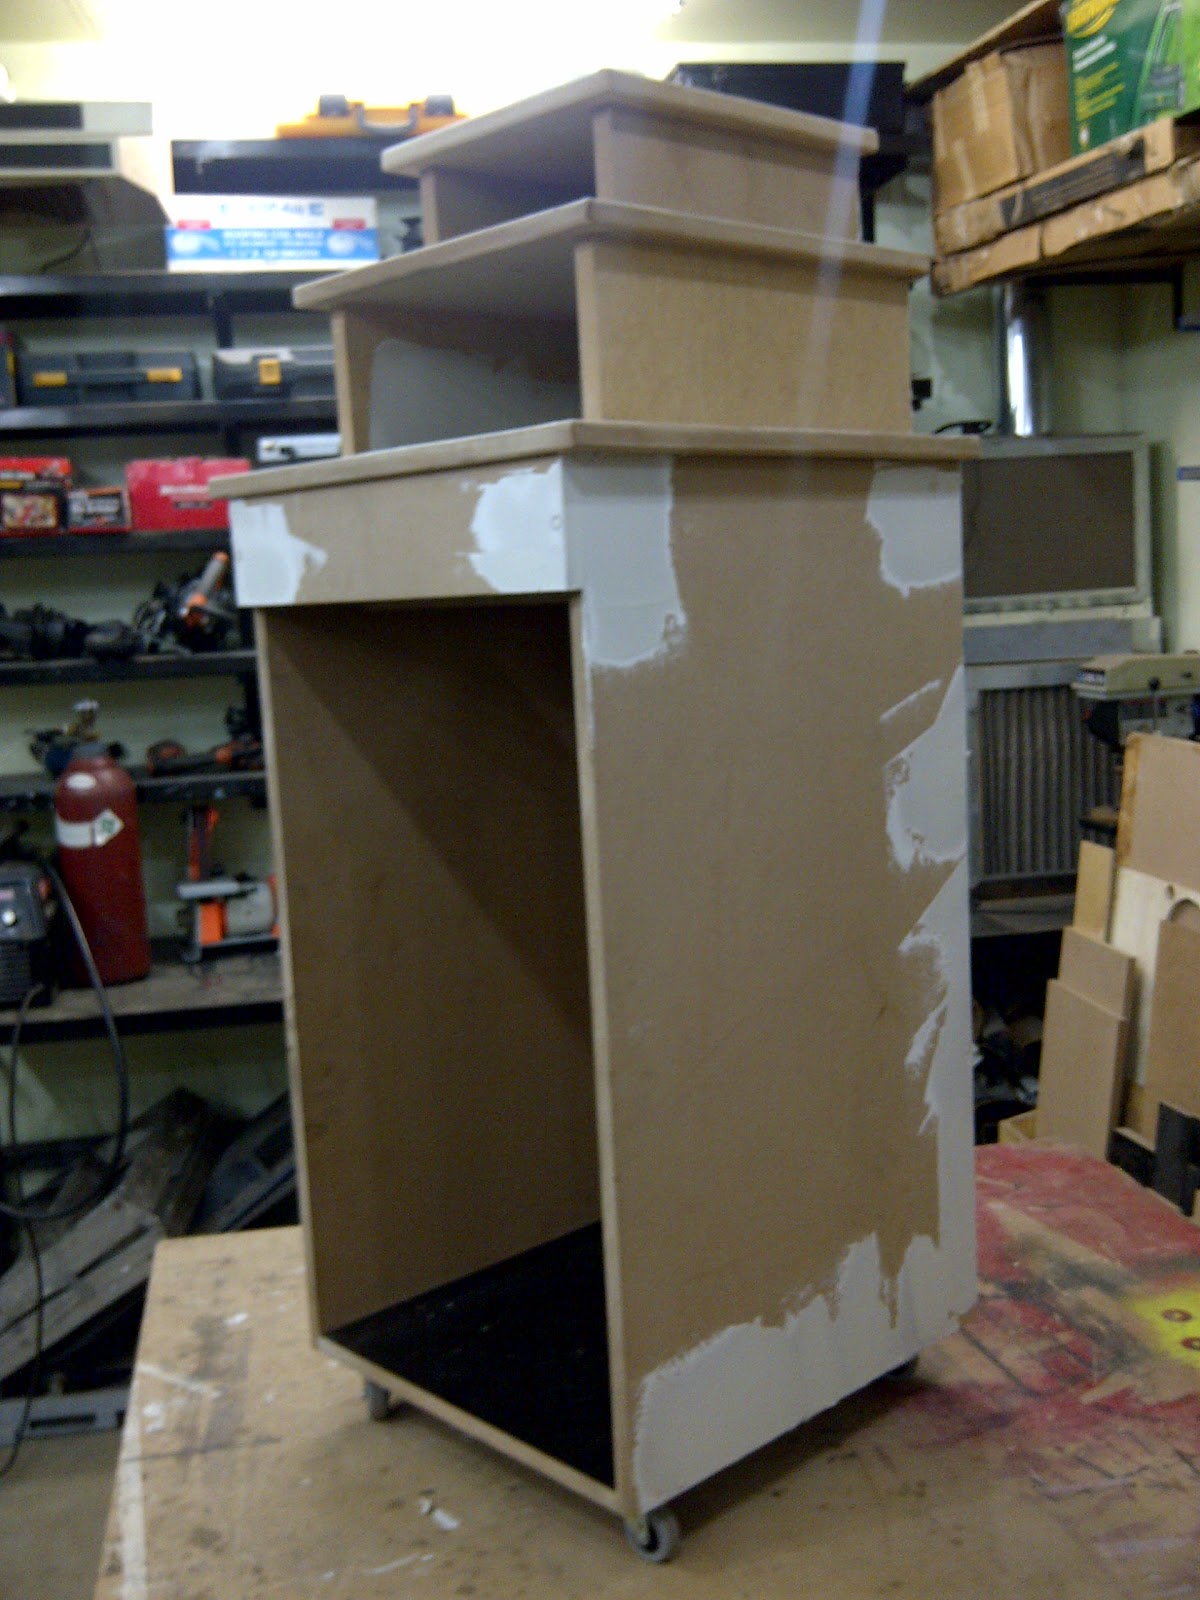
The plan was to build 3 independent units, 36" wide by 7 feet tall, 21" deep with lots of shelves, a place for our TV in the middle unit and building in our little electric fire place we bought a few years ago for some extra ambiance.

Process:
Step 1: Plan the wardrobe
Step 2: Get the materials
Step 3: Cut all the parts to their proper size
Step 4: Fill all the holes with wood filler and prep for painting
Step 5: Paint the wood
Step 6: Put it all together
Step 7: Final touch-ups

Pictures:

Old dresser my parents bought me in 1992!
Second dresser. This sucker went through about 4 moves and was still as solid (and heavy!) as when it was new

The plan
Some of the wooden shelves cut up
The sides to the wardrobes
The tops and bottoms
The 9 drawer fronts
A jig I used to space the dowels perfectly
Putting it together to make sure it fits. I ended up inadvertently opening the garage door which squished the unit and damaged one shelf. I was actually quite impressed with how strong it was and that there was not more damage
Close-up of bottom of shelf
I had to create a temporary spray booth for painting the doors because it was raining outside
My temporary paint booth worked perfectly
The doors after they were primed
The sides after they were painted
Most of the parts after they were painted
14 shelves, 9 drawer fronts, 6 side walls, 3 tops and 3 bottoms
1/2" melamine for the drawers. This is for the last 5 drawers; I had already built 4 at that time
One unit once I've emptied the old dressers and my wife's walk-in closet of all my clothes
Ta-daa...
Just for size comparison. The 3 units are 9 feet wide, 7.5 feet high and 21" deep. They must weigh 500 lbs!
Final shot of the 3 assembled wardrobe units

Tools:

Table saw, Drill, welder for making the jig, measuring tape, square, air nailer, router, planer, iron for iron-on edging, compressor, paint gun, hammer, pencil, dremel

Materials:
MDF, dowels, 2x4s for corners, wood filler, screws, primer, paint, nails,

Cost (approximate):
5/8" MDF (7 sheets): $310
1/8" MDF for backs (3 sheets): $40
1/2" Melamine for drawers (3 sheets): $75
2x4s for corners: $30
2 gal primer: $40
2 gal paint: $80
3 packs of dowels for shelves: $15
8 sets of hinges: $50
24 door/drawer handles: $45
9 sets of drawer slides: $100
TOTAL: $785.90

Time:
Approximately 50hr

Savings:
Not sure what 3 custom-built units like these would cost but my guess is at least $750 per unit. So the total savings are about $1,750

Conclusion:
Love them! It was a LOT of work but definitely worth it now that they're done. They are so solid that I know we'll still have them in 20 years (if we still want them then)

Saturday, September 15, 2012

Kitchen Garbage Bin

Project:
Build a garbage can for the kitchen on wheels that doesn't look like a garbage at first sight, is large enough so it doesn't have to be emptied all the time and when it does, it should be easy to do

Process:
Melanie and I have both been annoyed at how quickly the garbage can under the kitchen has been filling up so quickly and of course, emptying the trash is nobody's favorite thing to do so it usually doesn't get done until it's overflowing. By that time, it's an even bigger pain in the butt to do so one of the first "projects" on parental leave was to remedy that situation.

Although it took about 3 weeks to accomplish (amidst the feeding, diapers and trying to get Ellie to sleep) I finally finished it up.

I took my inspiration for the design from the inukshuk; I think it's really beautiful. I tried to find a picture online that I could turn into something resembling a garbage can but could only get part-way there. I have to admit, the final product doesn't screem "inukshuk" but at least for me I know the design's origin.

Once I figured out the measurement it was pretty simple to put together. I used 5/8" MDF, sanded and painted it, then put a clear coat of hardwood floor sealer on it to make it more durable. The most time however, was spent on the garbage bag holding mechanism. I wanted it to be something very simple to use so I wouldn't be the only one ever changing the garbage bag which I knew would be the case if changing it would involve more than two or three steps.

Instead of trying to explain it all in words I'll do brief captions on the pictures below

Videos:


Pictures:
The picture that inspired me

After the rough MDF construction and first coat of crack-filling

Sanded and ready to paint

Finished primer

Painting the metal pieces for the garbage holder mechanism

More metal for the mechanism

The finished garbage can with a little drawer for my wallet, glasses, bb and keys

When the garbage is full

Step 1: lift up the top locking mechanism and hook it onto the little hook I made. Step 2: pull it out to the first notch and remove the full garbage bag

Step 3: Pull it out to the second notch, replace the garbage bag, push it back in and lock it in place

Metal rod on the left with the two notches
Tools:
Table saw, welder, oxy/acetylene torch, hammer, drill, wrenches, grinder, paint gun

Materials:
5/8" MDF, caster wheels, 6 feet of 3/8"x3/8" solid steel rod, 8 feet of 3/4"x1/8" flat steel bar, paint,

Cost:
$70.00 ($30 for the MDF, $20 for the casters, $10 for the paint)

Time:
All in all about 12hrs

Savings:
About $130, couldn't imagine getting one similar to this for under $200 bucks

Conclusion:
Works great and yes, I'm not the only one emptying the garbage now, whoohoo...

Friday, September 14, 2012

H2O Mop Take 3: The Capitulation

Project:
Fix that bloody H2O mop. Again!

Process:
This is a follow-up post to two earlier posts:
1. Fixing Melanie's H2O Steam Mop
2. H20 Mop Take 2: The Rebellion

Last week I was getting ready to mop the floors for Mel and after a few minutes the mop didn't seem to produce any steam. I realized that the epoxy glue I used on the blue water filter a year ago or so had dissolved with the vinegar I used to de-calcify the mop and because of that a little bit of air was able to get sucked into the machine which essentially stopped the vacuum required to suck water through to create steam.

I went out in the shop and took the filter apart again, cleaned out all the glue and ended up trying to plastic-weld it back together with the acetylene torch instead of using glue. It didn't really work until I resorted to the soldering gun with a flat attachment. All put back together I realized that the initial oxy/acetylene "heat-treatment" warped the intake fitting. After drilling it out and exchanging some o-rings I got it semi-working except for the water tank kept creeping up and because of it kept leaking some water onto the floor.

Fed up with the ugly concoction I capitulated and ordered two replacement filters online for $20 bucks. In retrospect I should have probably done that from the beginning. Lesson learned: Fixing is NOT always the best option. Unless of course you want to know how everything works. In that case, taking stuff apart is absolutely essential.

Pictures:
The ugly filter after plastic-welding it together with my soldering gun

You can see how the oxy/acetylene attempt at plastic-welding warped the round fitting at the top

Brand spanking new water filter. Oh, so pretty and only $20 bucks for two of them

Looks a lot nicer and actually works!
The beauty in all its glory
Close-up of the replaced filter

Tools:

Oxy/Acetylene torch, soldering gun

Materials:

Cleaning supplies, replacement filters

Cost:
$20.00

Time:
1hr

Savings:
none

Conclusion:
In Nathaniel's words: I guess I learned something today

Friday, August 31, 2012

Magnus Chord Organ

Project:
About two months ago when Moncton had their annual spring clean day Melanie, Nate and I went (as they say in Ontario) "Junking". As we were driving by this one house Melanie saw an organ and exclaimed: "Hey, my friend had one of those and I've always wanted one." So I stopped and picked it off the side of the road and loaded it into our van

After having it sit around my shop for several months I finally worked up the courage to tackle this project. It ended up being a lot simpler than I thought.

Process:
First I wanted to figure out whether it even worked. I had tried it briefly a couple of months ago and it didn't seem to work so now that I had a closer look at it I realized that there was a small little switch on the side of the organ. Once I turned it on it started whirring and to my surprise it actually worked.

First thing I did was take it all apart. It was actually really easy. A couple of screws at the bottom and a few marretts to disconnect the chord and I could open it up. Then a few more screws, a little c-clip and I could slide out the plastic keys of the keyboard.

After grinding off some of the rust on a couple of brackets and a good "deep-clean" of all the plastic parts I put it all back together, sanded off the rust on the brass feet on the legs of the organ and put it all back together. After many long-lasting and sometimes frustrating projects, this was a nice and quick and enjoyable restoration project.

Pictures:
The Major and Minor Chord keys

The true ugly beauty. Just the way we found "her"

Close-up of the keys

Springs put pressure on the keys to keep the reed holes closed

Some water must have gotten into the organ and started rusting the brackets and the steel rods that allow the keys to pivot on

Side view after the main keys were all taken off.

The keys after they were all individually scrubbed with soap and water

All the parts that I had taken off, cleaned. The rusted brackets were wire brushed and painted black

Half-way through the re-assembly

Ready to put the shell back on

The finished produc

Tools:

Screw driver, grinder, brushes

Materials:
Some paint, soap and water

Cost:
$0.00

Time:
3hr

Savings:
$50.00

Conclusion:
Very enjoyable unless Nate plays it, which he loves to do!

Saturday, June 9, 2012

Cappuccino Maker Leak

Project:
Fixing the leaking DeLonghi EAM4500 cappuccino machine

Process:
Other blog post/fixes for the same model cappuccino machine:
It’s been almost exactly 5 years since I’ve taken on a couple of extra jobs so I could buy the ridiculously expensive ($900) but yet so wonderfully beloved cappuccino machine. I had originally calculated that the savings in Tim Horton’s coffee would pay off the machine within a couple of years and seeing as though we made about 7500 cups of coffee with that cappuccino maker since I bought it, the actual savings (if we had gotten a large coffee at Tim’s each time we made one with the machine) are over $11,000! Yes, that’s eleven THOUSAND dollars. Not like we would have actually spent that much at Tim’s but it looks darn good for the business case side of things.

About two years ago the gasket in the boiler unit started to leak a bit so I temporarily fixed it by making a gasket out of card stock and placing it under the silicone rubber gasket to give it a bit more thickness. However, now, two years later it completely dissolved and I had to find a more permanent fix. Unfortunately, the cappuccino distributers don’t have just the replacement gasket for the heating unit and I was left with either buying a brand new heating element ($250) or finding a way to fix it.

Once I dismantled the case I discovered that the leaking water had completely corroded the screws and brackets near the heating unit. After some prodding I finally removed it all and took it to the shop. Unfortunately, two of the screws were so rusted that they snapped off which meant I had to drill them out and re-tap the aluminum heating unit. Not much fun!

Another challenge was trying to find suitable material for the gasket. It had to be heat resistant and more importantly, it had to be food grade. After all, I wouldn’t want to be responsible for slowly poisoning my family or any guests we might have. So after much thinking I came to a McGyver-ish idea (thanks dad!). What if I took a silicone bake pan and cut my gasket out in the proper shape. It all made sense since those baking sheets/pans are heat resistant up to about 450 degrees (F) or 230 deg (C) AND they were food-grade.

So off I went to Canadian tire where they just happened to be on sale for 5 bucks. Bought one, brought it home, cut it up, shaved it to the right size (that was a bit time-consuming), put it all back together, greased it up with some high temp aluminum grease and turned it on. Soon I realized that the heat-resistant grease gave off a lot of fumes so I relocated the machine out to the garage and after keeping the machine on and heated up for an hour all the fumes stopped and I was ready to try making some java.

It’s been a couple of days now, the machine is put back together and on our countertop and I must say that $5 bucks plus a couple of hours were worth it and most certainly beat the $400 buck repair (element plus labor) it would have cost otherwise.

In summary, each cup of coffee cost us an average of about 20 cents and with the quality of the flavour you just can’t beat that!

Pictures:
The heating unit with the rusted bracket and the leaking gaskets
Inside of the heating unit: the water runs through the spiral and heats up
The top of the heating unit with the missing gasket; it disintegrated when I took it apart
The cut up 9" by 9" silicone baking pan
I used engineer's blue to print the outline of the heating unit top on the silicone material so I knew where to cut out the final gasket
The finally cut out gaskets (big one and two round ones in the middle)
The newly put together heating element with the new bracket and the replaced gaskets

 Tools:Screwdriver, small pliers, socket set, sand paper, elbow grease, engineer’s blue, scissors
Materials:
Silicone baking pan, high-temp grease, a couple of nitrile o-rings
Cost:
$5.00
Time:
5hrs

Savings:
$300.00

Conclusion:
I see many more wonderful coffees ahead!!!

Followers